 |
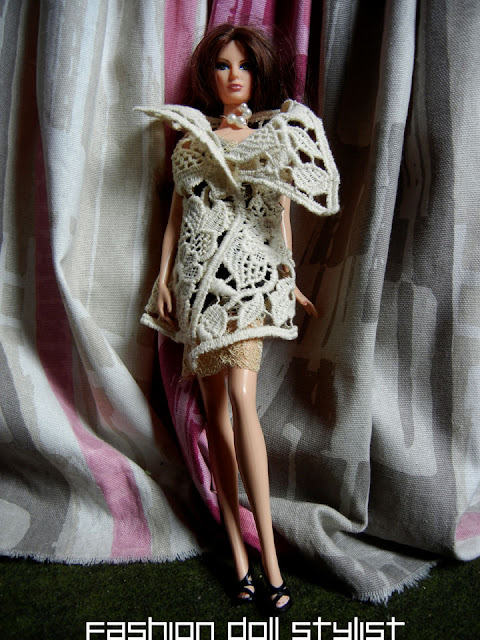
| The Original Style by Chloe & our 1st dolly interpretation. |
Sew Chic
Since there are a lot of dresses out there, I started with a simple sheath. For this I'm using two strips of beige cotton lace which, together, measure 1 meter (yard).
I laid one strip over one side of the doll starting with the top of the shoulder down. Tape in place. Then lay a second strip over the other side of the doll and pin down the center.
Turn the doll over and repeat, laying a strip down each side. Then pin down the center back. Here, I've chosen to pin from the waist down. Lay the front over the back at each shoulder and hand stitch in place.
Turn the doll to the side and pin the front over the back. Repeat for the other side. Stitch down the dress in the front. You can adjust the fit of the dress by layering the lace over itself and stitching. You can clip the small links within the pattern of the lace first, then layer over. Since we're working with white, when you stitch the lace together, the stitches won't be seen. Stitch down the sides. For the back, I stitch from the hips down. The dress can be closed with one or two snaps or hook & eyes at the waist and torso.
The back is equally stunning as the front!!!!
Vested Interest
Using the same technique and the same cotton trim, I've also created a small vest. In this case, I've paired it with a pretty, garden party printed dress.
In this case, I've cut a strip long enough to fit over the doll's front to back in a single piece. This eliminates the need to create a shoulder seam. I tape to the doll's body and repeat on the opposite side. Pin together at the center back. Then fit each side to the doll's body, stitching the lace together down each side. I also fitted the top edges around each arm, thus creating a cap sleeve.
 |
| The back of this vest is just as beautiful as the front. |
Again, at the back I've fitted the lace together with pins, then hand stitched everything together.
I also made a long sleeveless coat from a square of lace I found. It is as simple as wrapping the square around the doll, fitting her arms through the available holes in the lace.
Again, by layering the lace over itself and stitching down, you can control the fit in the places you want. For a look as to how I did this, take a look at the "couture" one I made with finer lace by clicking here. The newest way to wear these sheer laces is by wearing a colored garment (dress, pants + bra, bathing suit) underneath for tiny "pops" of color.
A Shift in Time
This is a simple shift with kimono sleeves. I made this using stretch lace trim. Marissa wears it over a hot pink bathing suit.
To start (top photo), decide on the length of sleeve you want. In this case, I chose a 3/4 length sleeve which I marked on sleeve sloper. Next (middle photo), take the sloper and lay the sleeve so that the center line is aligned with the shoulder of bodice. Draw your line (red dotted), from the shoulder down to the sleeve's hemline and then back to the bodice, curving the line just before it hits the side. Now extend the center front line (green dotted) of the front sloper to make the length you want for the dress. From the bottom of the armhole I draw a straight line to match up with the CF line. Ignore the dart. Repeat the same procedure for the back.
Now add seam allowance. Your pattern should look like this. You will place the center front line of the pattern on the fold of the fabric and cut one. The back has a seam so that you can plan for the doll to get in and out of the dress.
Once you have sewn your dress, instead of hemming the dress or turning down the edges, simply remove a bit of the scallops from the scraps of lace and sew. You can do the same for the neckline OR..carefully cut away some of the fabric from the pattern in the lace.
Well, it's almost time for this trip to end. But before the girls head back home, they'll be bringing you another hot trend they spotted on the streets of Paris: fringe!! Stay tuned!
Follow us on Twitter: @FashDollStylist
We're also on Pinterest: www.pinterest.com/FashDollStylist
And we've got a Facebook page: www.facebook.com/FashDollStylist


